Wednesday, April 25, 2012

bilge pump

4/22/12

so after that haul out ive been in project mode. good motivation. and finding that drip of the bilge from the keel made my next project the bilge pump. i bought this bad boy about a month ago on sale. RULE 750 Gallon Per Hour automatic pump.


i needed some help so i called up mikey brooks. he's a regular at the restaurant i work at and a legal liveaboard down here. i wont do electrical work alone anymore. and im glad i got help because my circuit board is a birdsnest from hell. we got some stuff untangled, followed the wires for the bilge pump switch, and it led to the mast light??? why? who? how? i dont know. dont care. we clipped those things off. a new LED mast light is another project of mine anyway so that can sit bare for a little while. we re-routed all the wiring. soldered all the new wires together. hooked up the hosing. and dropped the pump into the deepest part of the bilge. it runs perfectly. no more back breaking, hand pumping, once a month. i brought the dock hose into the boat, blasted the bilge clean. and flushed it all out the pump. no more musty filth under our feet. its dry and fresh smelling. the only thing is that we need to take the pump back out to put fresh hose-clamps on it, and to add some more length to the wiring. its deep down there, but the wires are taut, i'd rather it have some slack and sit flush at the deepest depth.


when i woke up the next morning, all i could do was smile as i heard that bad-boy automatically kick on, flushing out melted ice from my ice-box. it feels great cranking out these projects. i learn a lot and my pace keeps getting faster.


HAUL OUT


4/9/12 - 4/11/12


heavily drank all night easter night after an extremely busy day cooking easter brunch. woke up at 7am before the hang over even kicked in. prepped and cleaned the boat and dock area (mostly just picking up beer cans and whatever else a drunk may leave lying around) made it to the shipyard at exactly 8am for my scheduled haul out. she looked like a toy in that crane.


Once we got her out, hosed off, and onto the trailer. Rex (dana point yacht maintenance) pointed out the 300-500 blisters :(

blisters are a symptom of a condition that is commonly known as hydrolysis of the laminate. pretty much just comes down to osmosis of water through the resin because of the product they used back in the day and how long the boat has sat in the water. they can be ignored and "not cause a problem". rex told me "i've never heard of a boat sinking from blisters" but to me it was a problem that needed to be fixed. just imagining those pimples of acidic water in-between my fiberglass gave me a bad feeling. i didnt want to think about them growing larger, or cracking, or spreading. it was all negative. so i told him lets pop these things! (knowing that it would at least double the cost of my haul-out)

so we wrapped a skirt around the boat to keep in the dust and fibers from sanding, there was A LOT.

 here's rex scoping out the project and prepping.

here's me in the sanding outfit. full body tyvek suit. (tyvek is an amazing material. i have a jacket made from it and a jib sail the previous owner taylor made himself. it's ultra light, rip proof, water proof etc.) these suits were extremely hot inside. i was sweating out that easter binge drinking-fest from the night before.
here's what it looks like after popping blisters all afternoon. it was actually kind of fun under the skirt tent in that space suit. i felt like i was zapping aliens or something. each blister would pop and squirt in your face like a dirty zit.

here's a view from the inside of the boat with the sunshine coming through. pretty crazy. 

soooo i sanded through the hull of the boat... one of the blisters just kept going and going and i kept getting water out, until i bore right through. i was scared at first but rex told me its a common mistake for rookies. he patched it right up for me.
here's my lunchbreak view.

doheny as my background out of the cockpit.


so after sanding and popping all the blisters. we started to fill them all, spackling method. we used this product first.


while sanding, we noticed a drip that kept coming from the aft bottom corner of the keel. inside of which is the bilge. rex said its probably cracked and taking on minimal water. which explains why i have to pump my bilge more often than normal. so i sanded into it more and sure enough water kept pouring out. i went inside the cabin with the shopvac, cleaned the bilge out dry and spotless. then we patched up the tiny crack.


we spackled long into the night. got about 2/3 the boat done. and it was time to go to sleep. Piña, Claire, and I spend the night in our treehouse on land that night. 

this is the hardener agent that has to be kneaded into both agents before applying to the boat.

this is the second product we used after finishing and sanding down the first product.

looking a lot better. no more blisters. smooth fresh bottom.

the view from under the skirt with dust flying everywhere. 
spackled and sanded all day the second day. it was hot, humid, and my arms felt like spaghetti.

this is what it looked like after everything was done. ready to paint.

rex immediately started painting that night. i didnt want to pay for a 3rd day on land and it was meant to start raining that night and all the next day. not a big deal because he could paint under the skirt tent, but i'd rather just get this all over with and save at least a little bit of money.

heres how she looked the next morning. we left the cat on the boat, duh, and claire surprised me with a much needed hotel room for the night. its very rare for us to sleep on land, and use a regular bathroom, especially one with a jacuzzi :)

i only had about 15 minutes to check her out before i had to head into work. he did 2 coats of trinadad pro all around, 4 coats at the water line, and 3 coats before and aft the keel. i had him raise the waterline about an inch higher than the old one. 


thru-hulls looked great. they were nice and shiny before he painted over them.

after easter brunch, 2 days of about 15+ hours of work each day, and about 5 hours of sleep each night. i was ready to start my work week. beginning with a double... i ran to work while they put her back on the crane, rex finished up painting where the pads were. claire and rex drove her back to the slip. i came back from work to my newly done home, claire and Piña waiting.

sure it was a shit-ton of work and labor, plus expensive. but now that i have the mental insurance that the bottom was taken care of properly, ill be happy for at least 5-6 years until the next haul out.

another thing that made me feel good was just seeing splendid isolation out of the water next to similar sailboats. she was wider, bulkier, and had twice the keel. it made me feel lucky that i stumbled upon a boat like this for cruising compared to the others.


Saturday, April 14, 2012

new grill

3/27/12

screw that old kettle grill. im sick of hotdogs and ears of corn rolling off.


i found this force10 beauty at Minney's in Newport for only $35. it was black and gross. i gave it some lovin and now i have an awesome blazing hot grill.


almost died

3/21/12
so with those new AGMs in the cabin. i needed a new AGM for the outboard starter. you shouldnt run acid and AGM on the same system. i got another steal at west marine on a brand new deep cycle AGM for $160.

long scary story short. i hooked up the 3rd battery. started the motor first push. and everything was awesome. i come into the cabin to celebrate with a beer. and i smell smoke. look back towards the new battery and both terminals have at least 3 inch flames shooting out of them! i panic for half a second and realize it is crucial to my survival to not panic. i scurry to unplug all electrical connections. fire fizzes out. i bet under 5 more minutes of that and the boat would have been gone, me and piña exploded for the seagulls.

i thankfully got to return the destroyed battery to westmarine as a defective and hazardous product. the 12ft. of 4gauge wire linking the starter battery to the beast AGMs melted inside and needed to be replaced. i took care of all that and now our electrical system is all upgraded and running fine.


i will no longer do electrical projects without a drinking partner.

Knowledge is Power!

Electrical work scares me. Instant unknown death. When I bought this ship it had 3 deep cycle marine batteries, similar to the battery in your car. 2 to power the cabin and 1 to start the outboard motor.

*sidenote: i'm sick of capitalizing words, please deal with my grammar.

these 3 batteries were shot. they were acid batteries that needed to be refilled with distilled water, couldnt hold a charge, and who knows how old they were. (slight research showed 6+ years for the starter battery and 4+ years for the cabin batteries) they needed to go in the trash.

i love craigslist. i find steals all the time. i found a man in northern san diego selling a porta bote (whole other amazing story) but he also sold me 2 massive AGM batteries. They are made by NorthStar (NSB-M12-210FT) These go for well over $600 each brand new and last almost 20 years. they have a fiberglass core that wont crack or spill, and doesnt need distilled water added. pretty much the battery of the future. i stole these for $150 each and they are only 4 years old. He threw in a solar panel charge controller and 12ft of thick gauge wire too!

2/20/12 - 2/22/12
so the project consists of ripping out the old batteries, rebuilding the rotten battery box compartment to fit these big boys, and ending with a crash course in electrical.

so this is the before photo. notice the corrosion and mess of wires.
rotten wood that could barely support those inferior acid batteries will not stand up to the 100+lb. each of these AGM beasts!

i had fun smashing and shredding that clean.

cut out hole to insert the beasts. thank you gary for your saw!

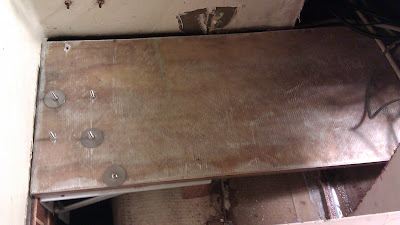
built stainless steal support

stainless steal support

outside extra support

notice my tiny legs of glossy wood.

the new solid piece of wood that hank beautifully fiberglassed for me. 
no rot in my future.

now showcasing the NorthStar AGMs! 
slid into place and strapped down with their seatbelt for intense sailing.


everythings labeled. brand new tips on all the wires. good to go!

the plan for these batteries is to be hooked to solar panels. they hold an incredible charge and last a long time on their own, so with the help of a trickle charge solar panel, we should hopefully have infinite power off the grid in our near future.


First Post!

First Post! Well, sense the boat was purchased well over a year ago and this blog was created today; there is definitely a great deal of information missing...oh well. I'll update you on the past if need be. I'll start off by posting a few of our accomplished upgrades from previous months. Thank you for your interest. I'll try my hardest to keep this thing interesting, comical, heart-warming, full of knowledge, and plenty of media. Enjoy!